
Help › Devices
Adding computers
Three ways in: a remote code for someone elsewhere, an install command for a computer in front of you, and a deployment key for many at once. Step by step for Windows, macOS and Linux.
Press Onboard a device on the Nodes page (you need the "Enrollment, approvals and device details" permission). Choose how the computer will be set up, which features it will allow, and who it belongs to.
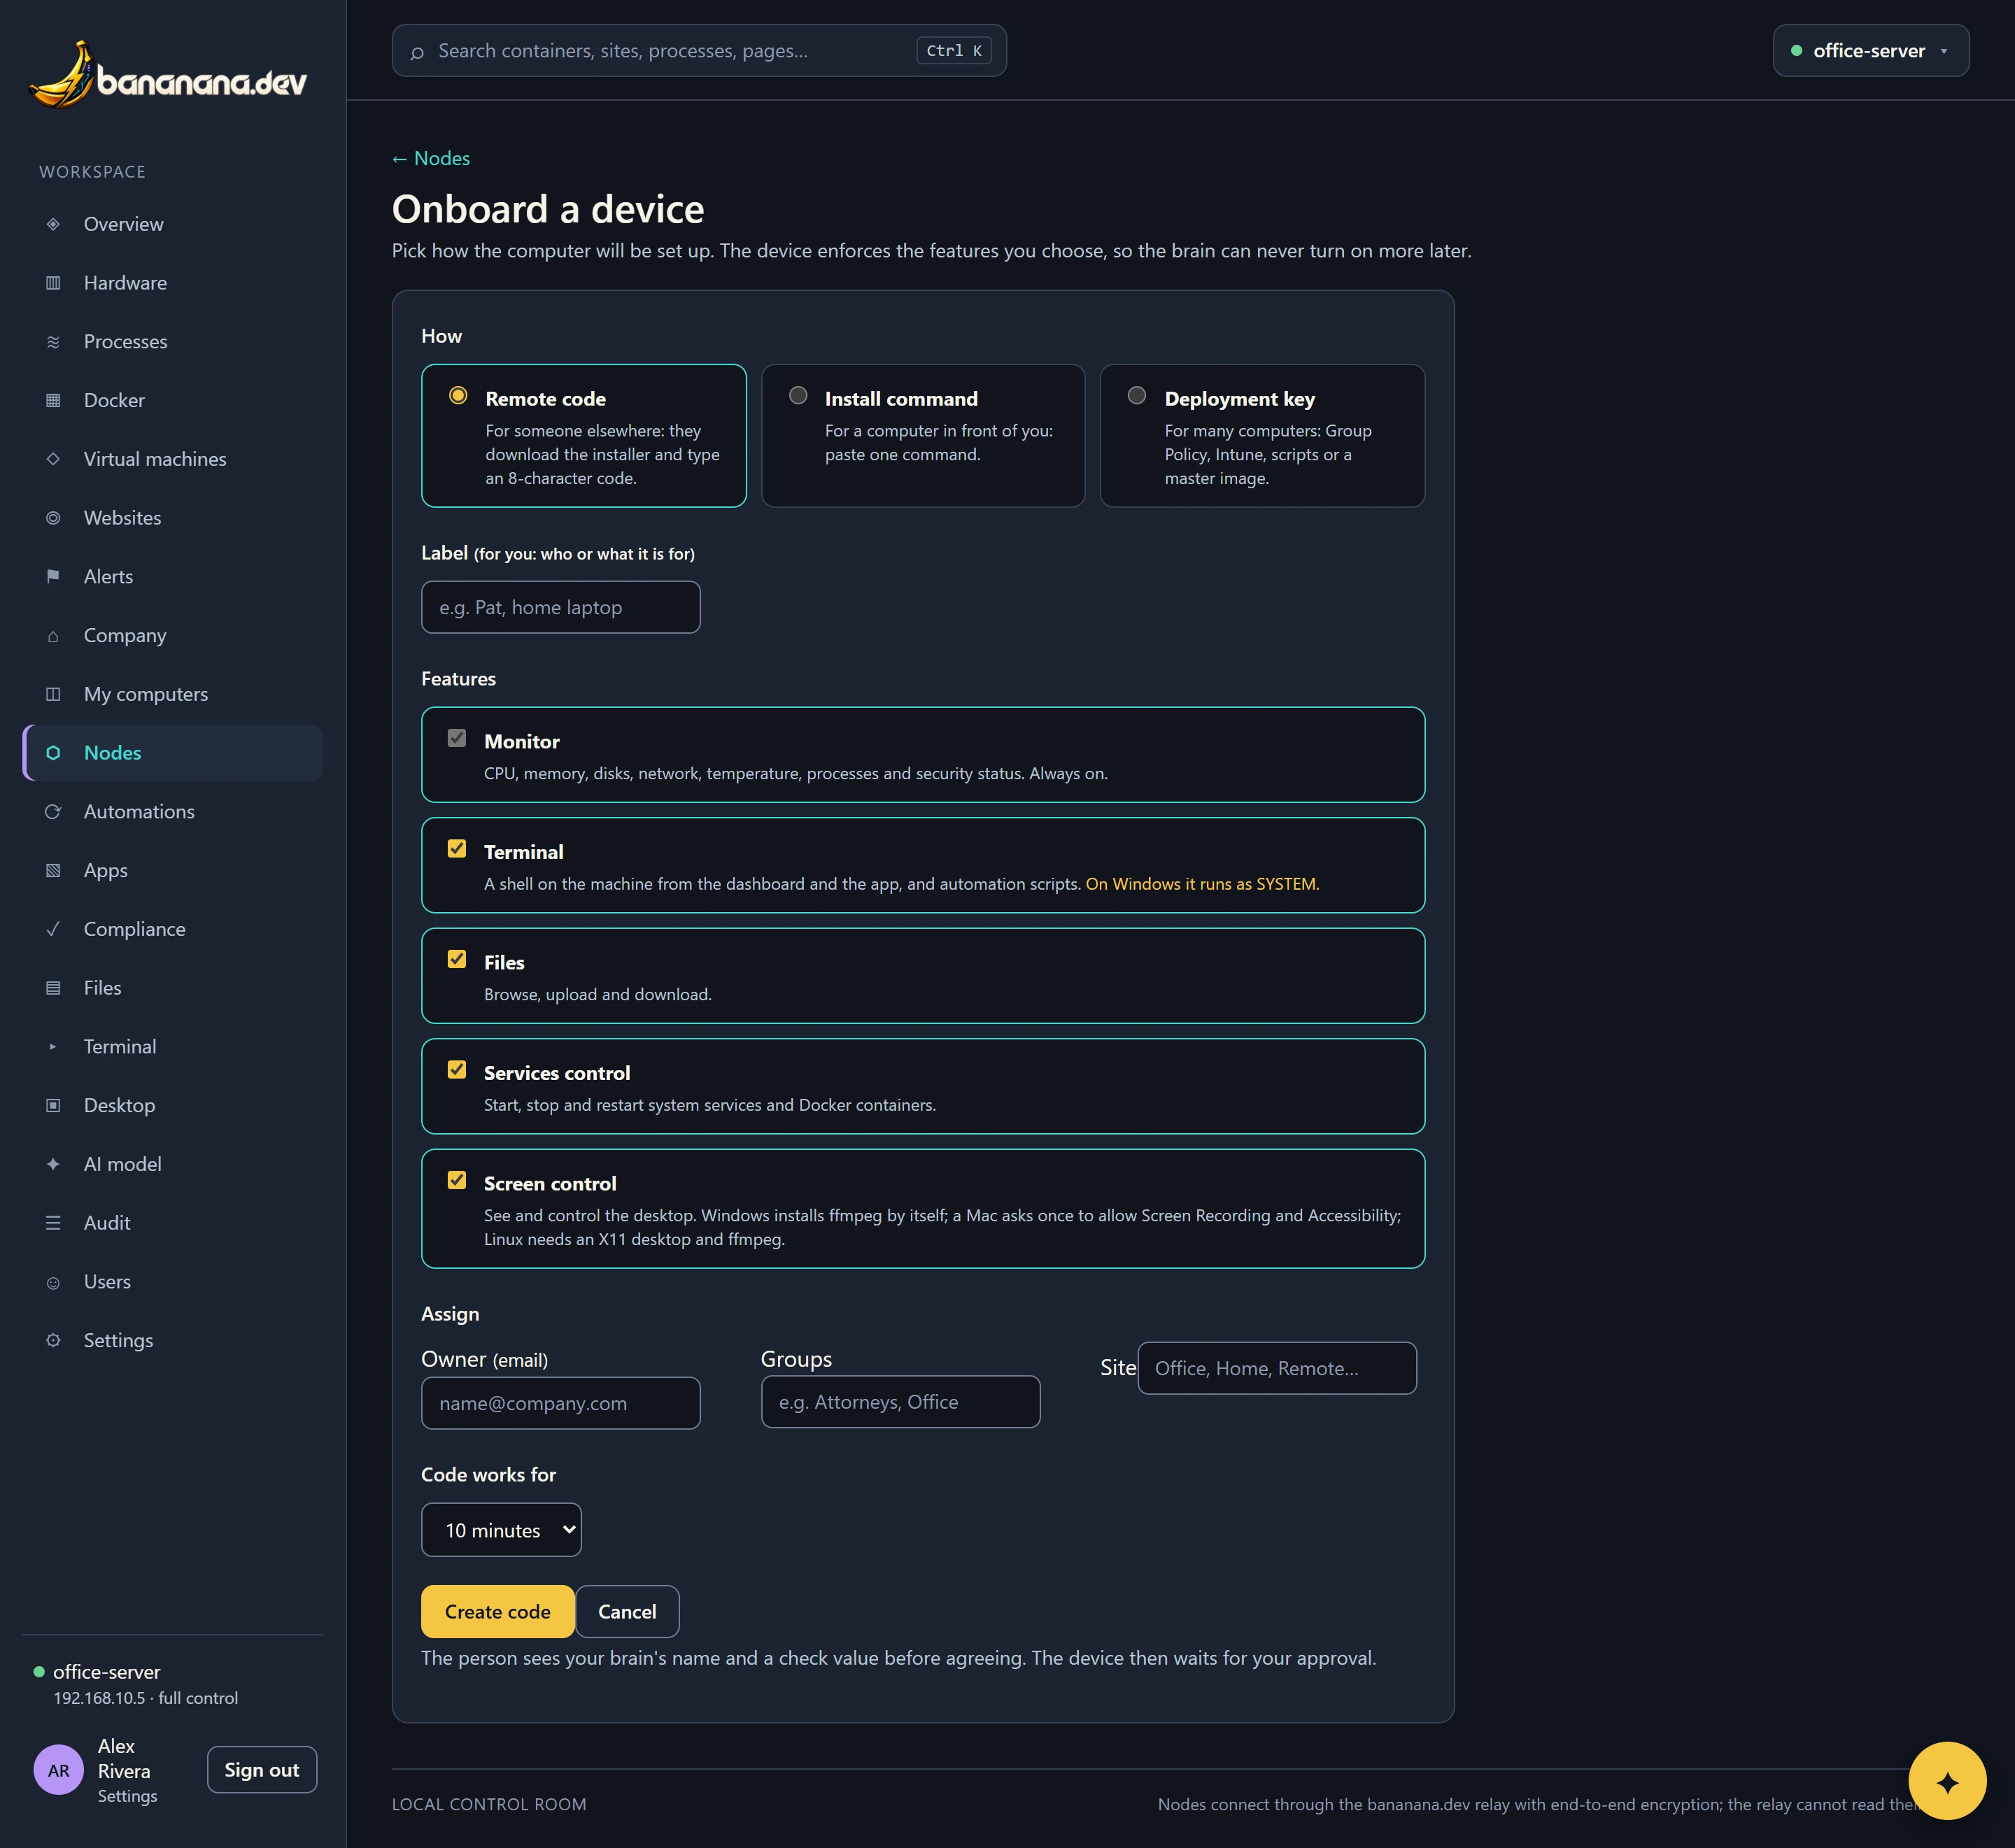
Which way to choose
| Remote code | Install command | Deployment key | |
|---|---|---|---|
| For | One person, somewhere else | A computer in front of you | Many computers |
| They get | An 8-character code: W7P6-58PT | One line to paste | A key for your deployment tool |
| Works for | 10 minutes (or 1 or 24 hours), once | 24 hours, once | 1, 7 or 30 days, up to the number of devices you set |
| The device then | Waits for your approval | Is approved straight away | Waits for approval, unless you chose "approve automatically" or its serial is on the expected list |
What you choose for every method
- Features: Monitor is always on. Terminal, Files, Services control and Screen control are optional; the computer enforces your choice, so the brain can never turn on more later. Someone at the computer can still change them with
bananana-node enableordisable. What each one allows: How bananana.dev works. - Assign: an owner (by email), groups and a site. The device starts with these, so its apps, rings and compliance baseline apply from the first minute.
- Label, for codes and keys: just for you ("Pat, home laptop"), shown under Open invitations and on the approval.
Remote code: for someone elsewhere
- Choose Remote code, fill in the features and assignment, choose how long it works, and press Create code.
- Give the person the code. Press Email instructions to send them an email with the code and the steps below, or read it to them over the phone. Codes ignore upper and lower case, and never use 0, O, 1, I or L, so they're easy to type.
- They follow the steps for their system (below). The installer shows your brain's name and a check value; the same check value is on your screen, so they can confirm it's really you.
- The page says Enrolled as soon as their computer connects. Approve it: Approving devices.
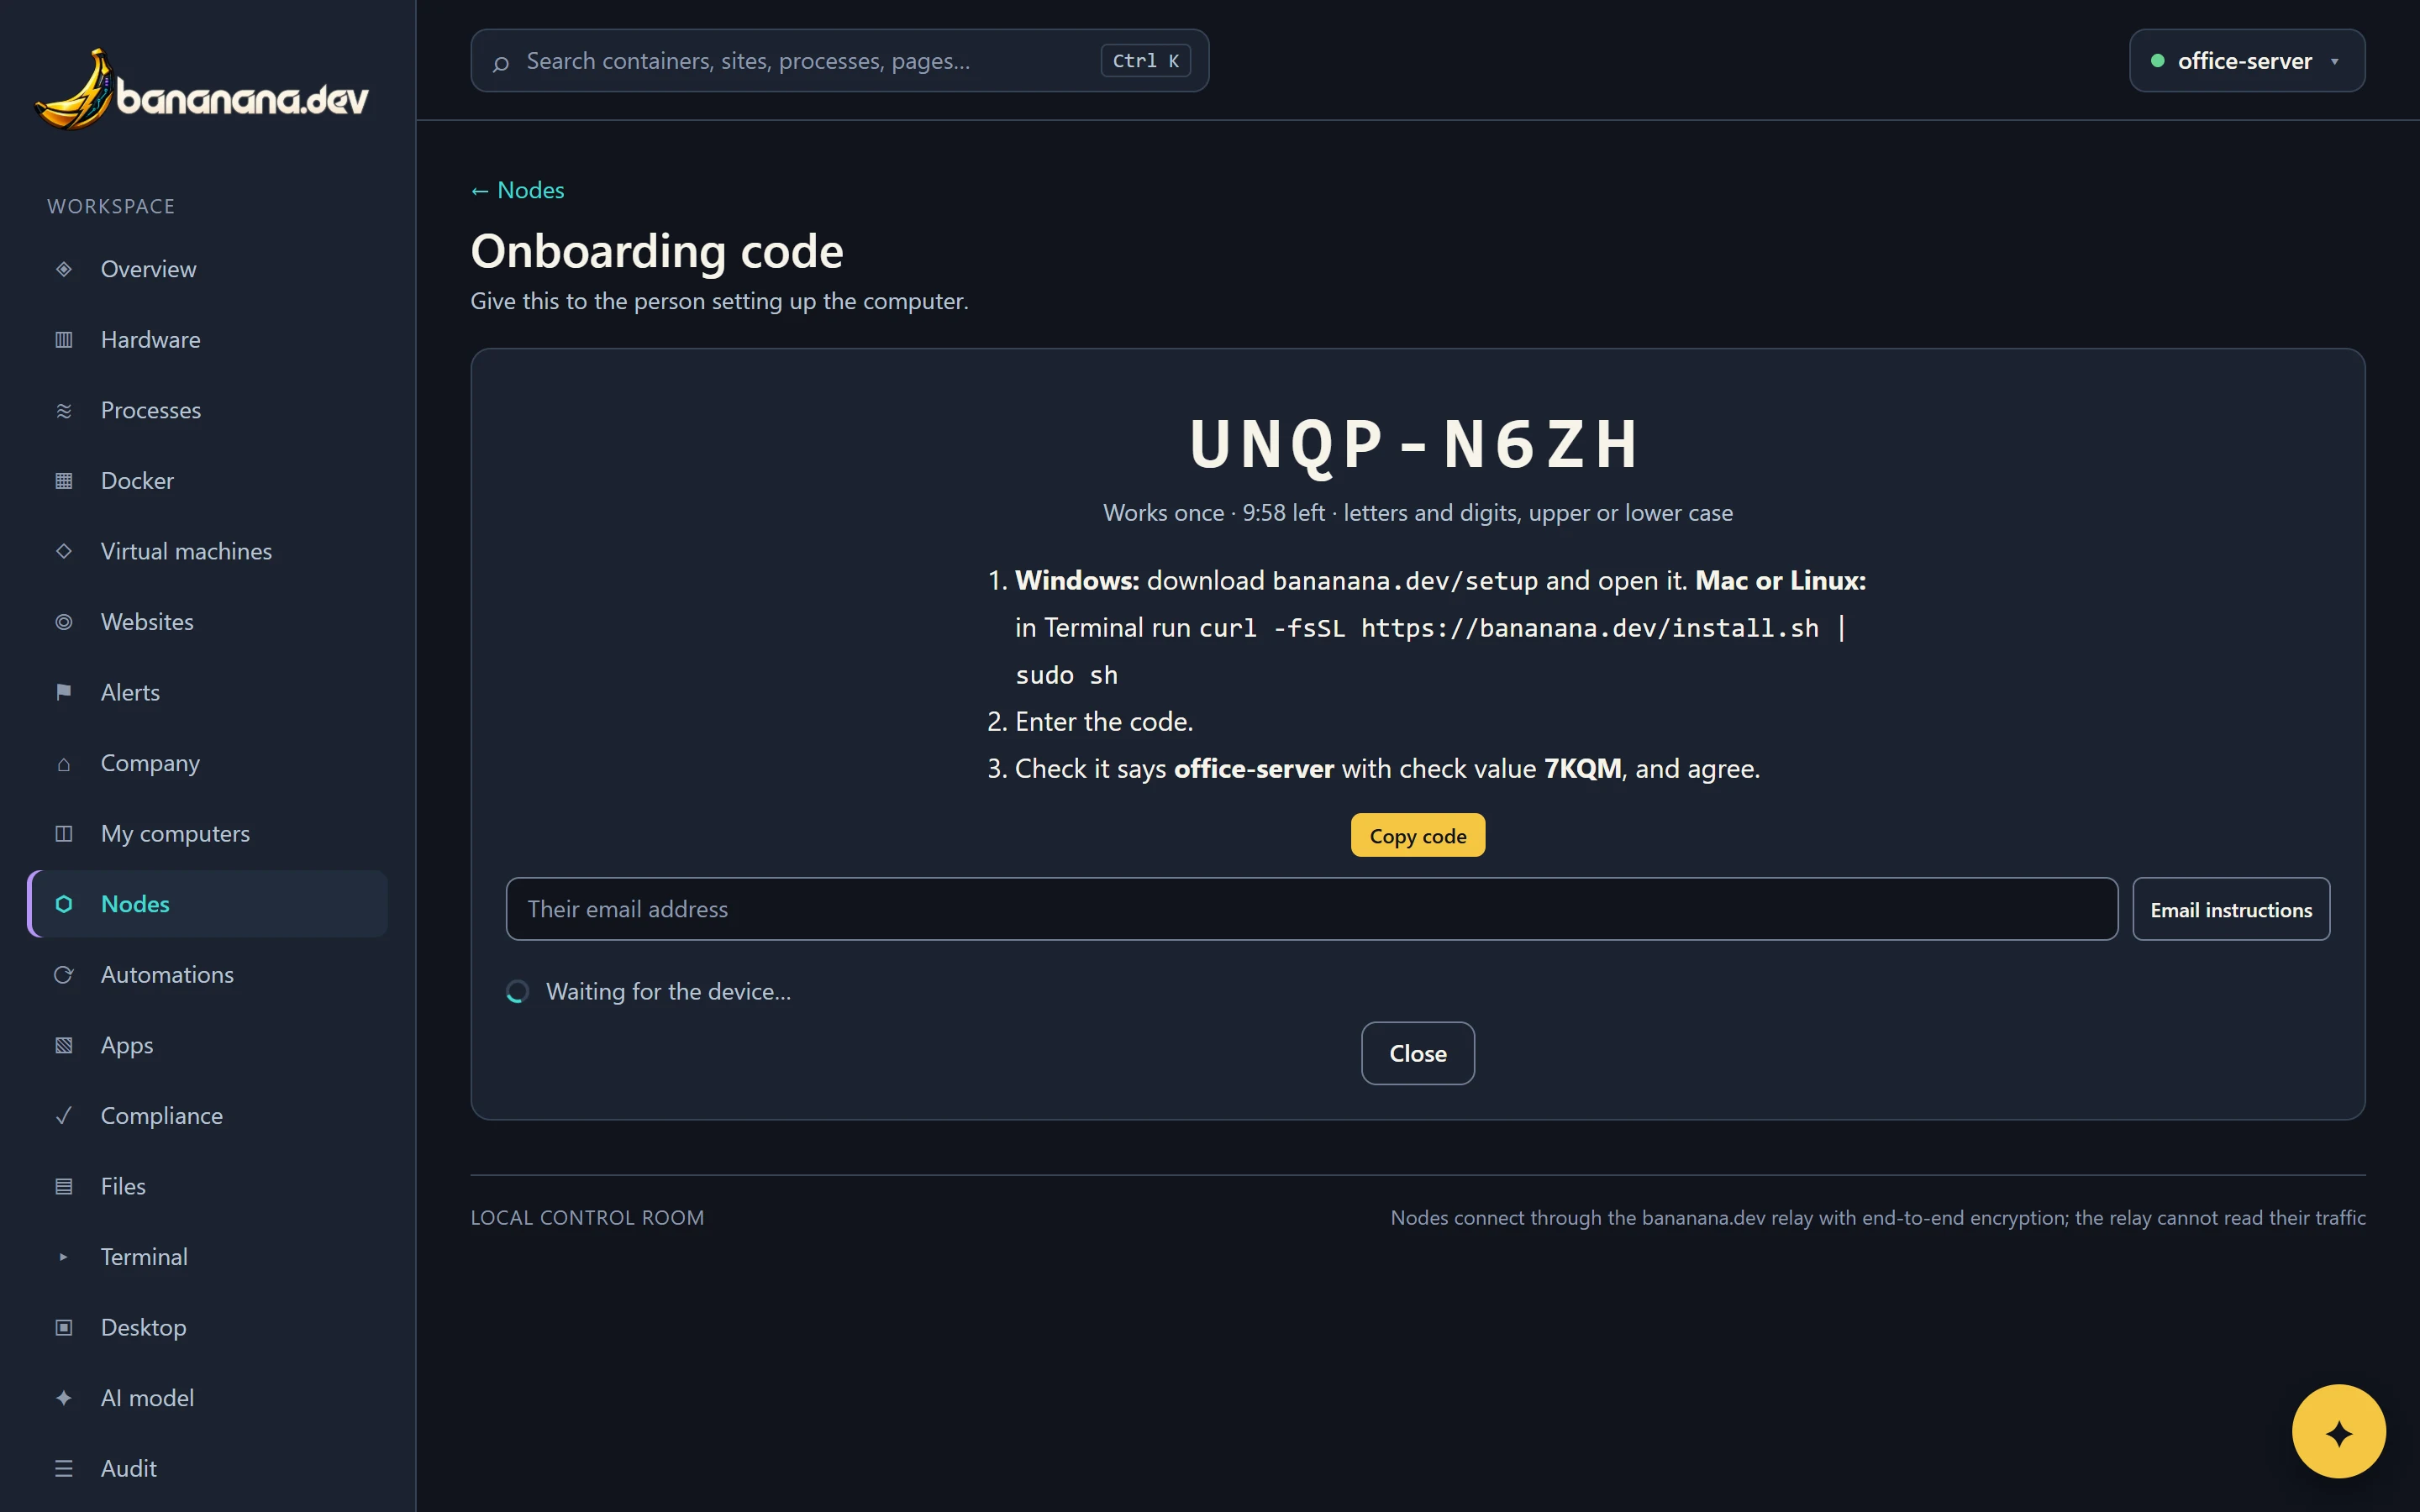
What the person does on Windows
- Download bananana.dev/setup and open
bananana-setup.exe. - Windows asks whether to let it make changes: choose Yes. (If SmartScreen warns about an unrecognised app, choose More info, then Run anyway.)
- Type the code and press Enter.
- Check the name and check value match what IT said, type
yand press Enter. - It installs and connects. The bananana.dev icon appears by the clock.
PowerShell works too: open PowerShell as Administrator and run & ([scriptblock]::Create((irm https://bananana.dev/install.ps1))). It asks for the code.
What the person does on a Mac or Linux
- Open Terminal.
- Run
curl -fsSL https://bananana.dev/install.sh | sudo shand enter their password when asked. - Type the code, check the name and check value, and type
y. - On a Mac with Screen control, macOS asks once to allow Screen Recording and Accessibility.
Install command: for a computer in front of you
- Choose Install command, give the computer a name, pick its system, choose features and press Create install command.
- On the computer, open PowerShell as Administrator (Windows) or Terminal (Mac, Linux), paste the command and press Enter.
- Watch the page change from "Waiting for the node to connect…" to Connected.
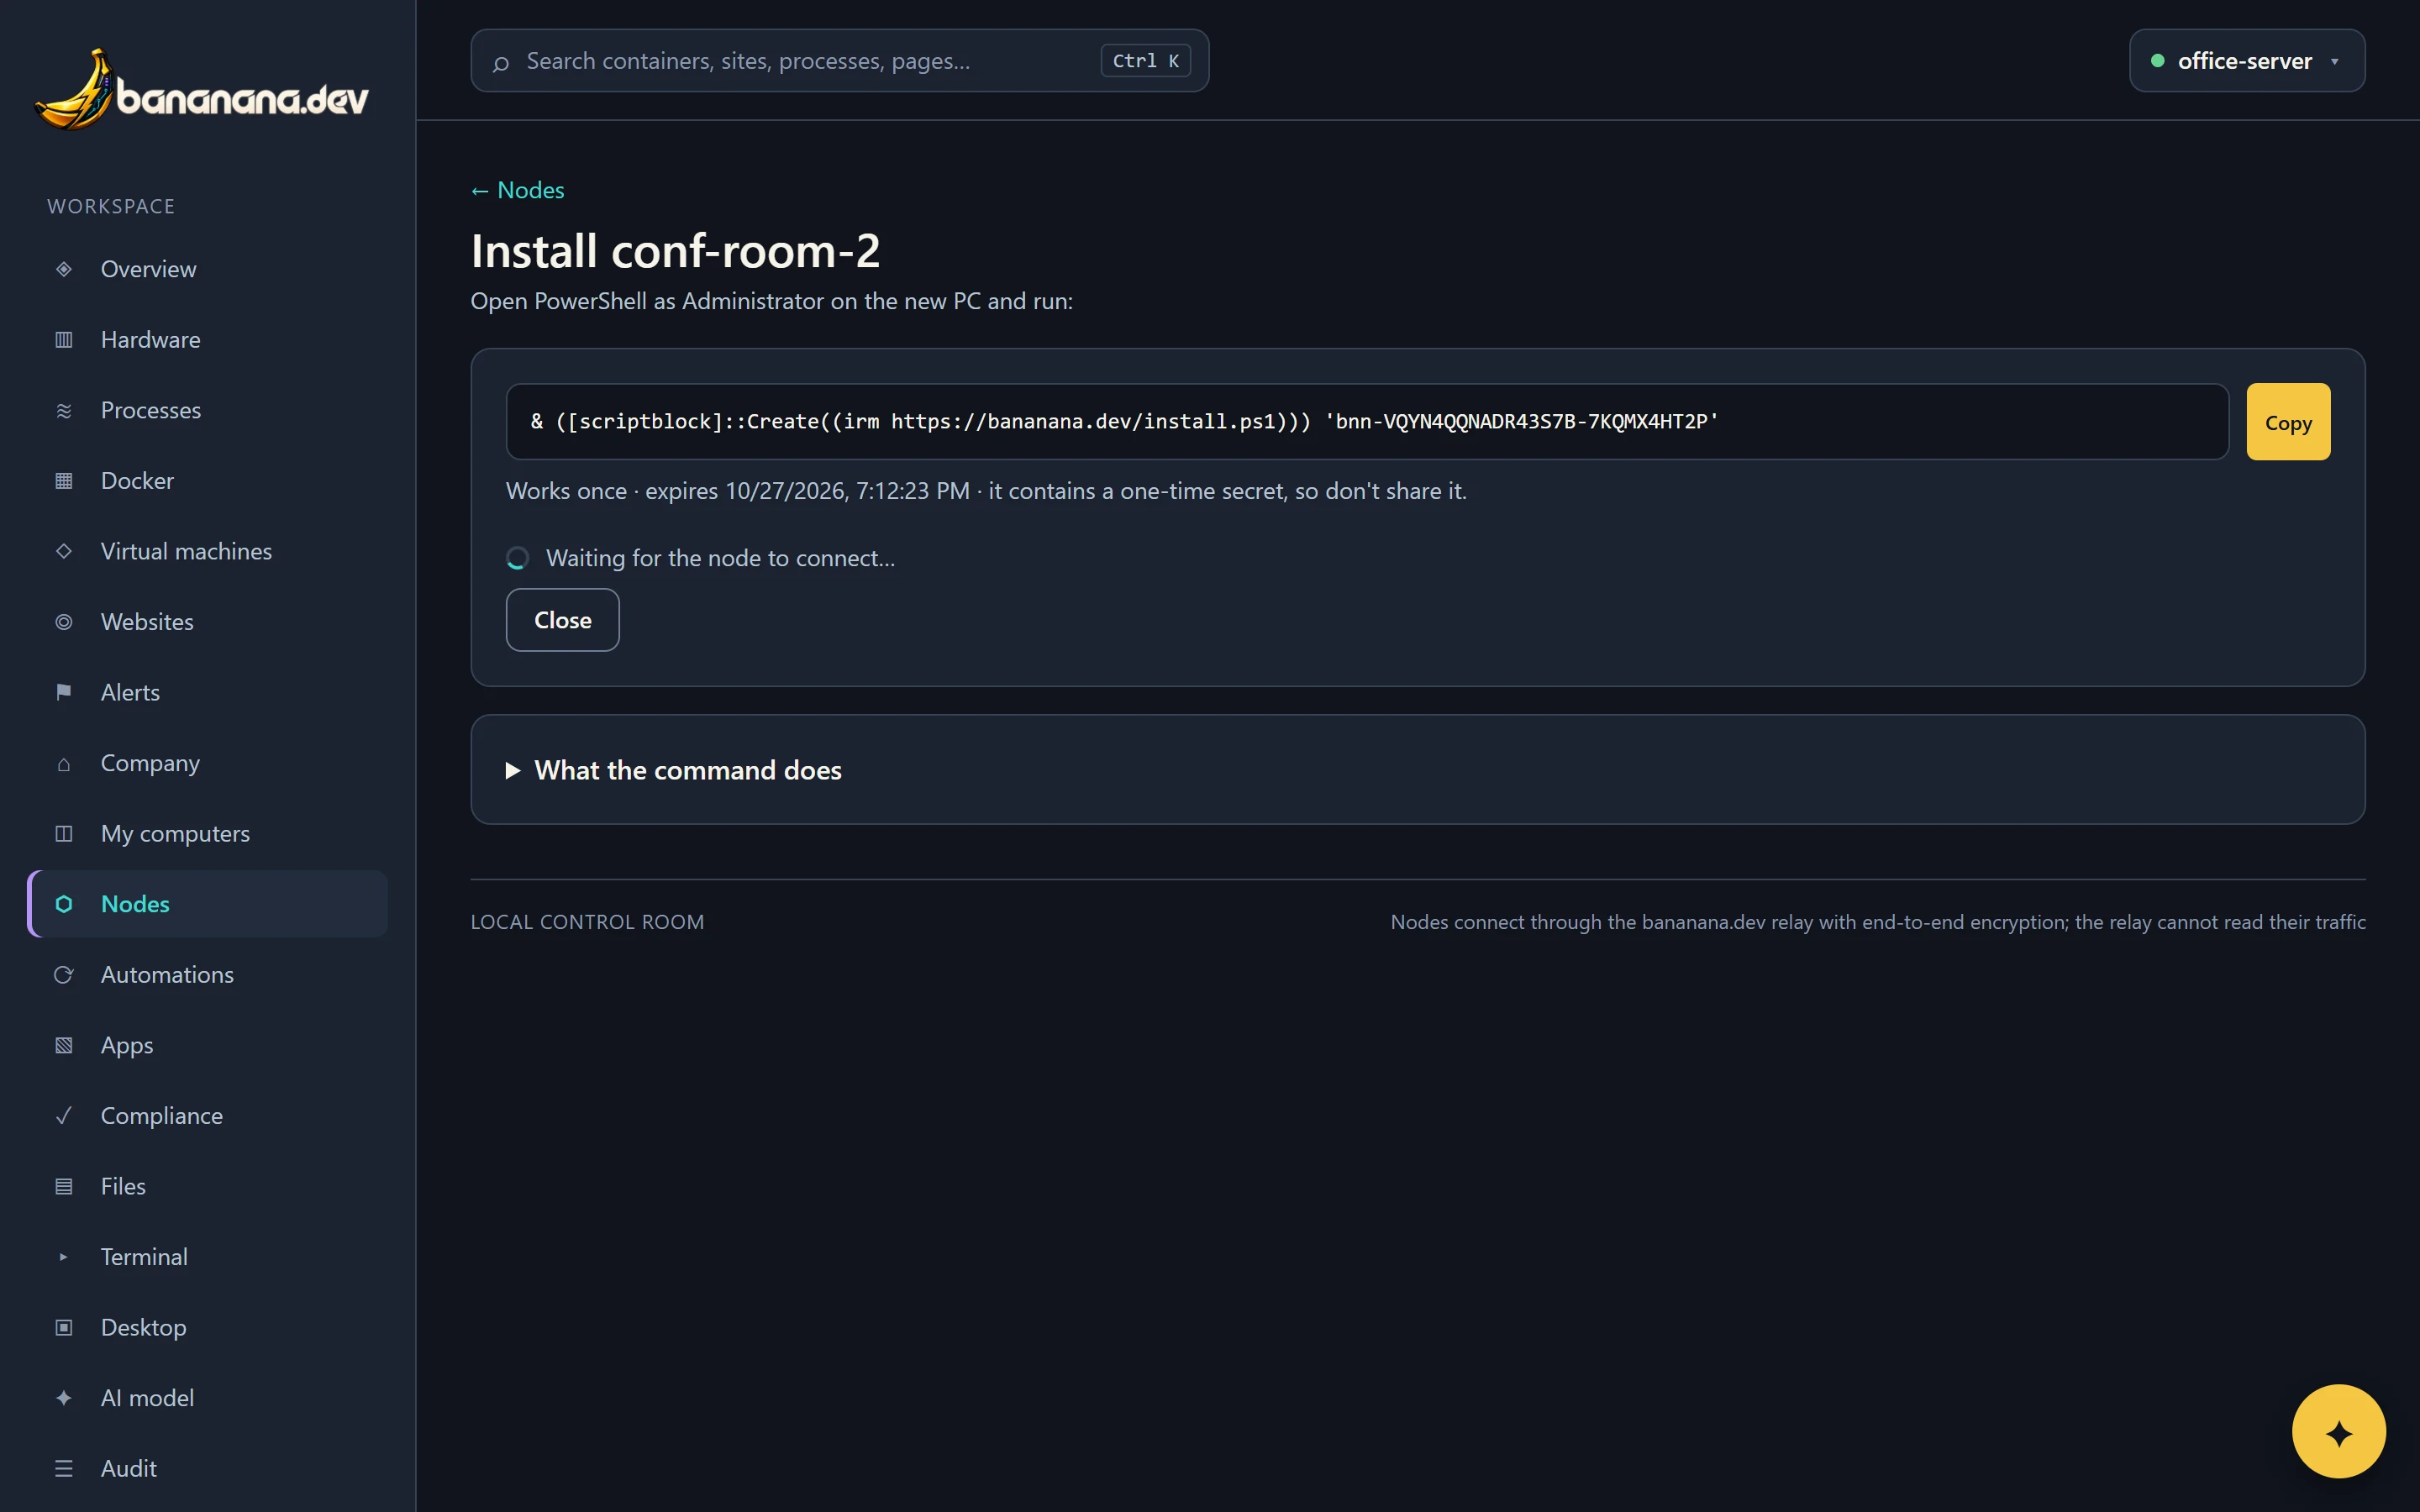
The command contains a short token like bnn-…-7KQMX4HT2P. Its last part is a fingerprint of your brain's key: the installer checks it, so nobody in between can point the computer at a different brain. Keep the command to yourself until it's used; it works once.
Unraid, TrueNAS, Synology: the Docker image
NAS systems like Unraid don't have the system service manager the Linux installer uses, and Unraid forgets anything installed outside Docker when it restarts. For these, run the agent as a container instead.
- Choose Install command, give it a name, pick Docker as the system and press Create install command.
- Open the machine's terminal (on Unraid, the >_ icon at the top right), paste the
docker run …command and press Enter. - Watch the page change to Connected.
The container shares the machine's processes, network and name (--privileged --pid=host --net=host --uts=host), so it reports and manages the machine itself: its disks, temperatures, Docker containers, files, and a terminal on the host. Its identity is kept in the bananana-node volume. Screen control isn't available in the container. A deployment key also comes with a ready-made Docker command, and Docker Compose works too: put the code in BANANANA_NODE_TOKEN in this compose file.
To remove it: docker rm -f bananana-node && docker volume rm bananana-node, then remove the device on the Nodes page.
Deployment key: for many computers
For a new office, a laptop refresh, or anything you deploy with Group Policy, Intune, PDQ, SCCM, Jamf, Ansible or a provisioning script.
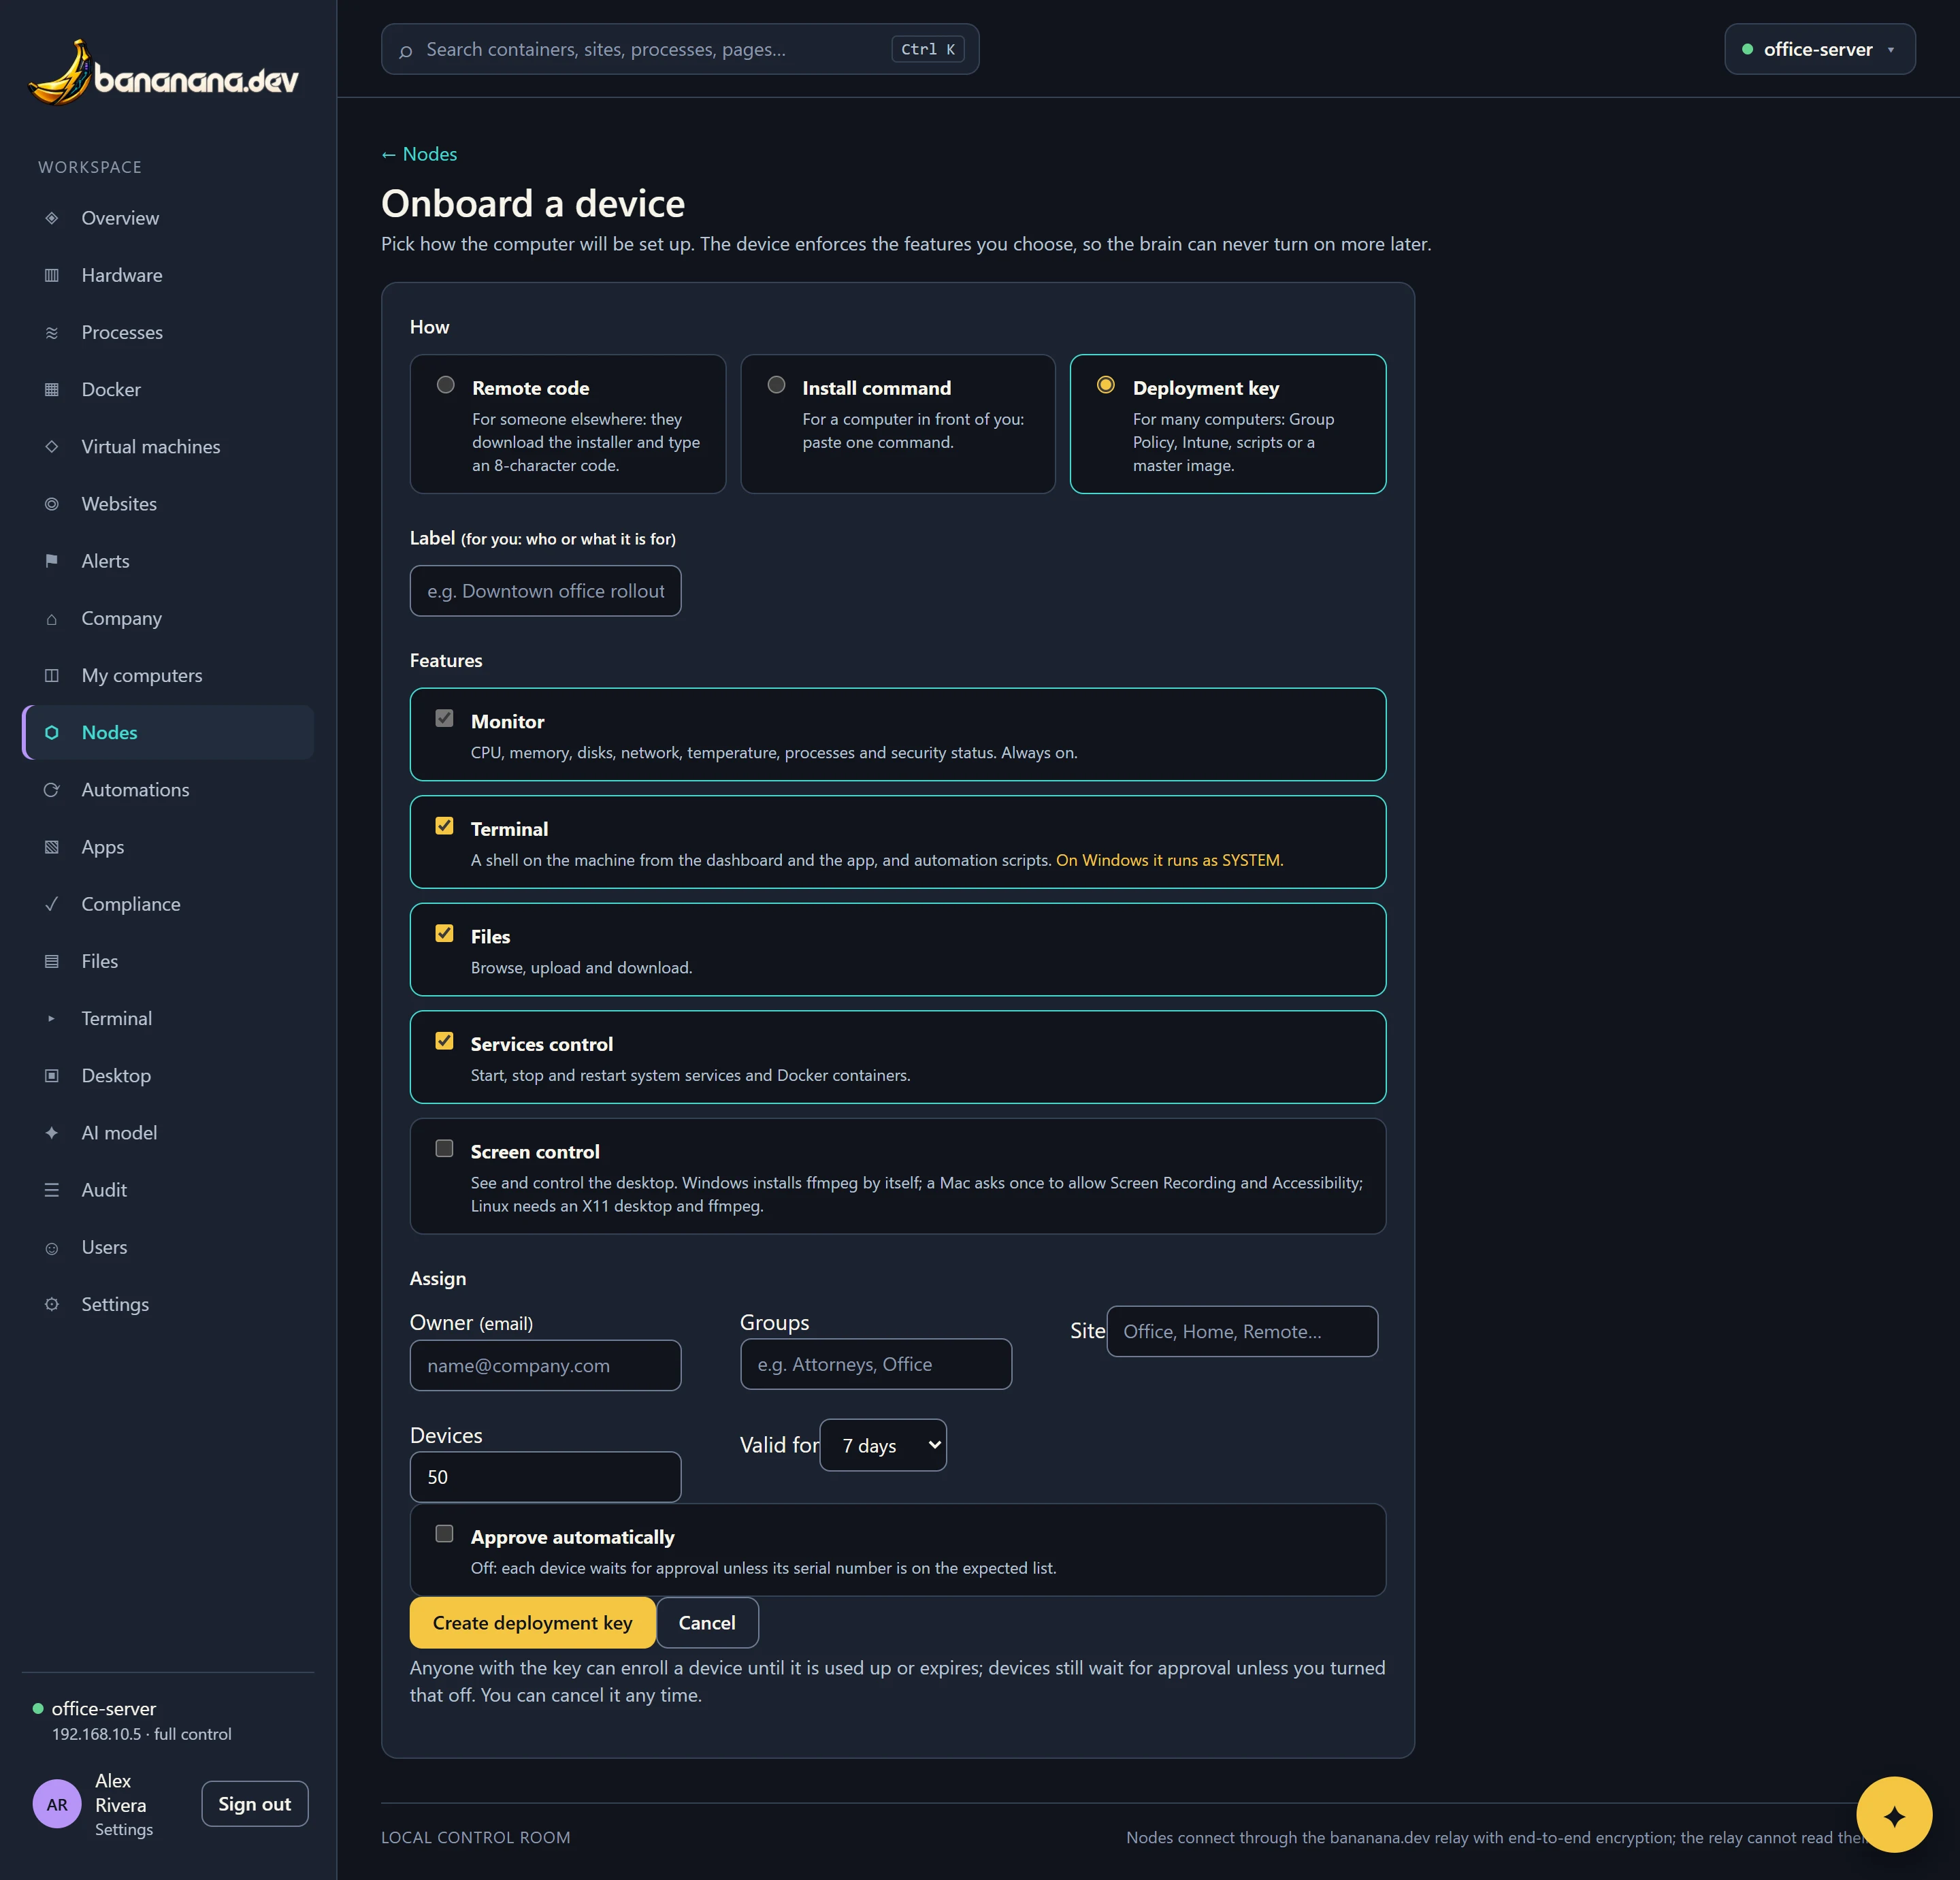
- Choose Deployment key, fill in the features and assignment, set Devices (how many may use it) and Valid for, and decide on Approve automatically.
- Press Create deployment key. You get the key and ready-made commands.
- Deploy with the command that fits your tool (below). Watch "9 of 25 used" climb under Open invitations.
- Approve the new devices in one go, or let the expected-devices list do it: Approving devices.
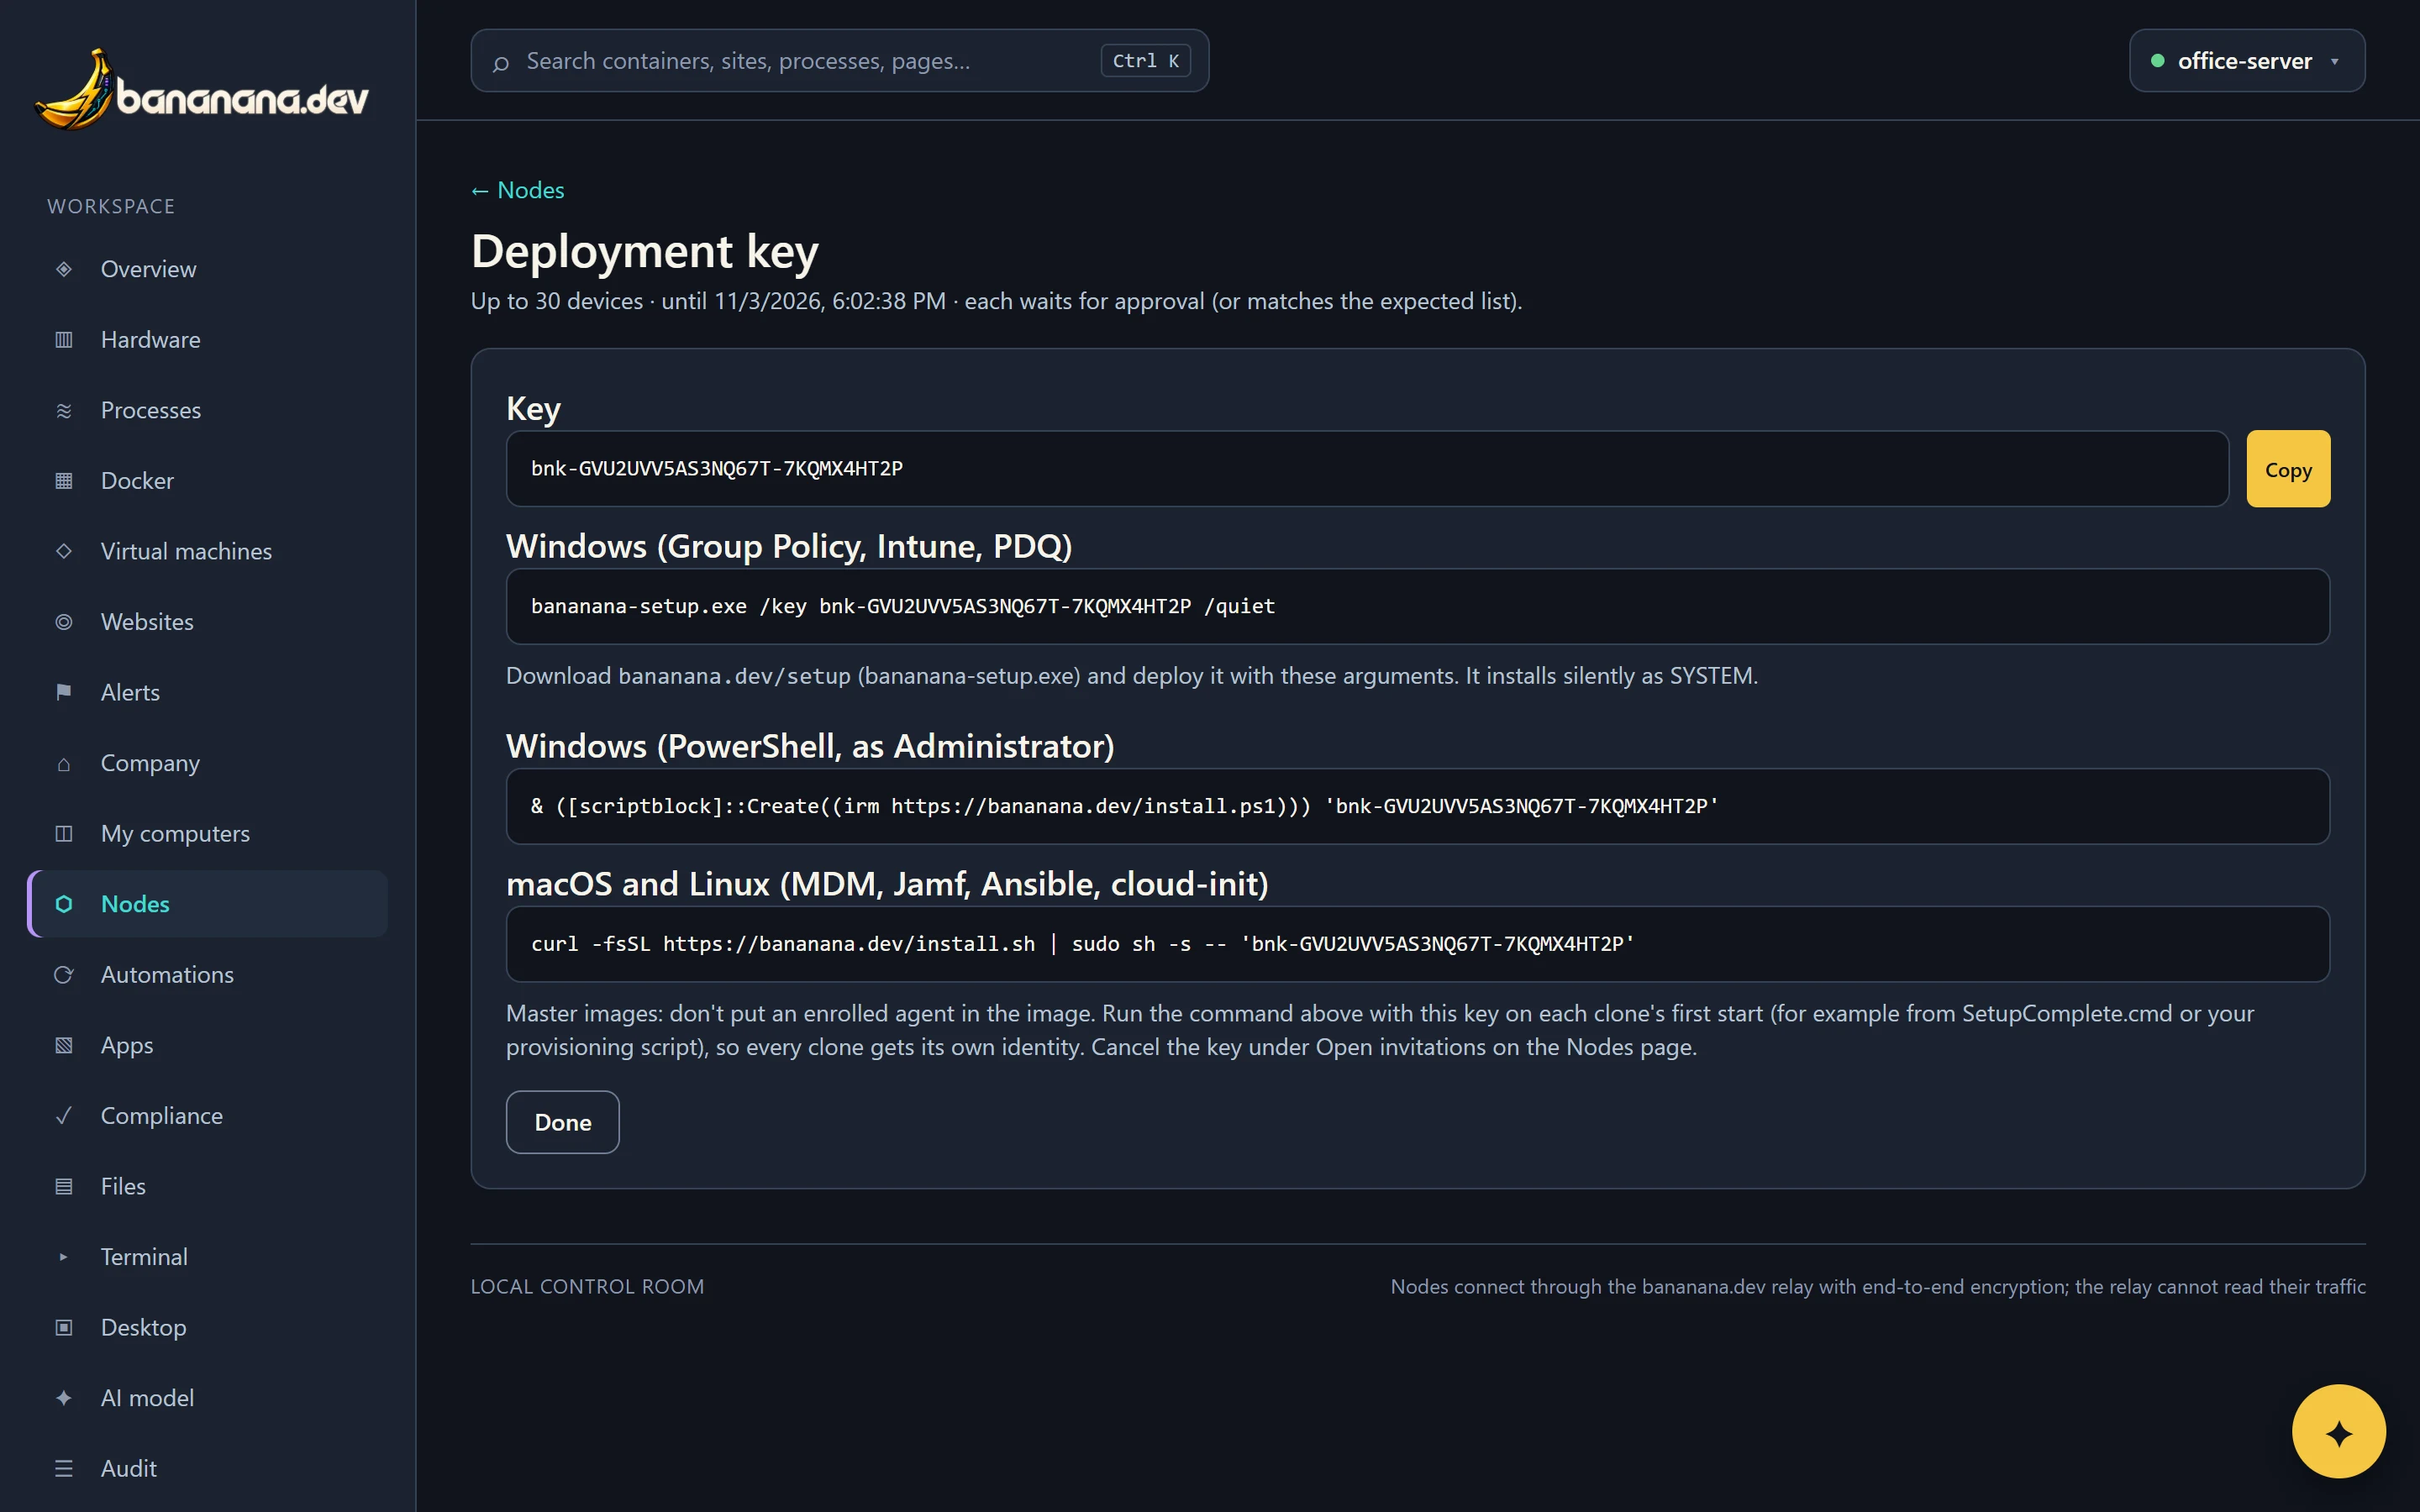
| Tool | Run |
|---|---|
| Group Policy, Intune (Win32 app), PDQ, SCCM | bananana-setup.exe /key bnk-… /quiet as SYSTEM. Get bananana-setup.exe from bananana.dev/setup. |
| A PowerShell script | & ([scriptblock]::Create((irm https://bananana.dev/install.ps1))) 'bnk-…' |
| Jamf, an MDM, Ansible, cloud-init | curl -fsSL https://bananana.dev/install.sh | sudo sh -s -- 'bnk-…' |
| Docker (Unraid, TrueNAS, Synology) | docker run -d --name bananana-node … -e BANANANA_NODE_TOKEN='bnk-…' romanvaxman/bananana-node (the full command is on the key's page) |
Anyone with the key can enroll a device until it's used up or expires, so treat it like a password. Leave "approve automatically" off unless every device is coming from a source you control, and cancel the key under Open invitations when you're done.
Open invitations
Every code, command and key that hasn't been used up appears under Open invitations on the Nodes page, with what it's for, how many uses are left, whether devices need approval, who made it and when it expires. Cancel stops it working at once.
If something goes wrong
| The installer says | Means | Do |
|---|---|---|
| no such code, or it expired | Typo, more than 10 minutes passed, or it was already used or cancelled. | Check the code; make a new one. |
| that code has a character codes never use | They typed 0, O, 1, I or L. | It's probably the digit or letter that looks similar: 8 vs B, 5 vs S, 2 vs Z. |
| the brain's key does not match | The token's fingerprint doesn't match the brain the relay pointed to. | Don't continue. Make a new command from your dashboard and contact us. |
| too many attempts from this network | 30 wrong codes in an hour from one place. | Wait an hour. |
| not enrolled; nothing was changed | Nobody answered y, or it ran without a terminal. | Run it again in a normal window; for deployment tools use a deployment key (no question asked). |
More in Troubleshooting.